One of the most common terms you will hear about when it comes to photography is exposure.
But what does 'exposure' actually mean and why is it important?
Read on….
When we talk about exposure what we are really referring to is how much light the camera sensor has been ‘exposed’ to.
If the sensor is exposed to a lot of light you will end up with a very bright and light image. If you expose it to way too much light your image will just be white - nothing else, just white!
If the sensor has been exposed to too much light your image will be too bright and this is known as being ‘overexposed’.
Conversely, if the camera sensor is exposed to lower levels of light you will end up with a darker image. If exposed to way too little light your image will be black.
If the cameras sensor has not been exposed to enough light and you have a dark mage then this known as being ‘under exposed’.
The following images show a sequence of images from under exposed to over exposed.
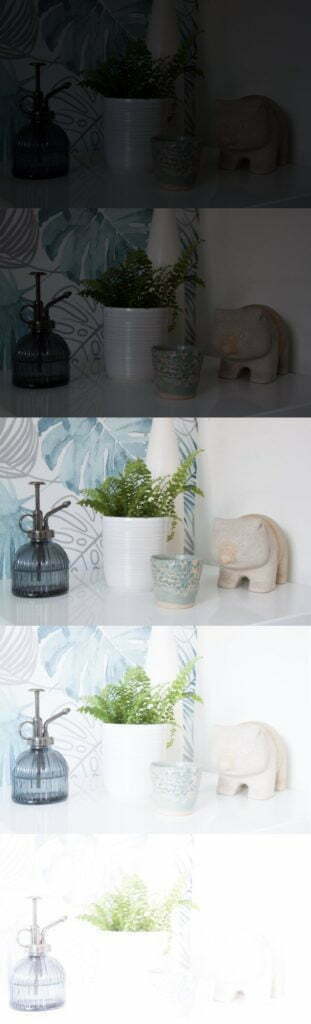
In the above sequence the middle image is correctly exposed. The others are either under or over exposed.
The skill in photography is being able to allow the cameras sensor to be correctly exposed so that you end up with the ‘perfect’ image - one that is neither too bright nor too dark.
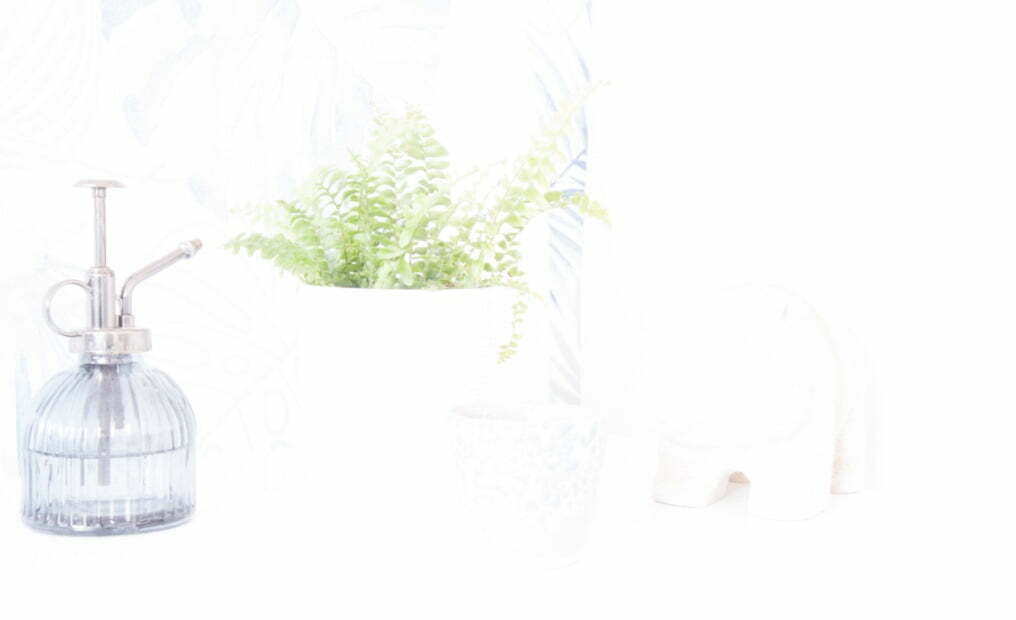
As an image becomes more and more over exposed you find that more and more pixels in the image turn to white. As more and more pixels become white you find that you start to lose detail in your image. This happens because as more and more pixels turn white you end up with bigger and bigger areas of your image that are just white - ie you end up with bigger and bigger patches of whiteness until eventually your whole image is taken over by white pixels - arhhhh!
This gradual increase in the number of pixels turning white as your image becomes more and more over exposed is known as over exposure and you start to get loss of details in the highlights. This loss of details in some areas of the image is known as being ‘blown out’ - see image below.
The same applies with an under exposed image. The more underexposed it becomes the more and pixels turn black. And as more and more adjacent pixels turn black you started to lose the detail until eventually you would just end up with one totally black image.
A perfectly exposed image is one in which each area of the image is neither under nor over exposed - from the highlights through the mid tones to the shadows.
(“Highlights” are the brightest parts of your image - “shadows” refers to the dark areas of you images - “mid-tones” refers to the area between the height lights and the shadows)
Okay, I hear you say, so how do I make sure I have got right exposure?
Good question and one that gets right to the heart of photography with many articles and books written on the subject - it can be made to seem overly complicated but actually it isn’t as bad as it seems.
What you need to be able to do is to control how much light hits the camera sensor. Get this right and you have achieved ‘perfect exposure’.
There are 3 ways to control exposure:-
Each one of these can be adjusted to make your image darker or lighter. By getting the right balance between them all you can achieve the desired exposure.
Aperture
The aperture is essentially the hole in the lens of you camera that lets the light though.
By making this hole bigger or smaller you can let more light or less light through.
More on this in a moment.
Shutter speed
This is as it says on the tin - the speed at which the shutters opens to let the light in and then closes again to block the light out again. When you press the shutter button on the camera the shutter opens and closes - usually very quickly. But just how quickly can be controlled by you, the user. You can imagine that if the shutter opens and closes very quickly there isn’t much time for light to enter the camera and hit the camera sensor. Hence the image will be darker.
If the shutter opens and closes only quite slowly so that the shutter is actually open for a longer period of time then you can see that the amount of light it lets thought to the sensor is greater and hence you will end up with a brighter image - more light equals a brighter image.
Potentially this is the more difficult of the 3 to get your head around!
The ISO is essentially a measure of how “sensitive’ the cameras sensor is to the light that hits it.
It again can be controlled to make the sensor more sensitive or less sensitive.
The more sensitive you make the sensor the brighter your image will be.
The less sensitive you make the sensor the darker your image will be.
So, you can see that there are 3 methods of controlling the exposure of your image;
Good, all sorted then?
I think not I hear you say. So which one of the three do I adjust and when? Or do I adjust 2 and if so which two. Good questions. Read on….
You can probably see that that actually you could adjust one, two or three of the above to achieve the correct exposure.
If the light is very bright you could decrease the size of the aperture, increase the shutter and decrease the sensitivity of the sensor as all of these things will reduce the amount of light entering the camera and reduced the sensors sensitivity to that light when it hits the sensor.
If it was very dark you could increase the size of the aperture, decreased the shutter speed and increase the sensitivity of the senor for exactly the opposite reasons mentioned above.
So, how do you decide?
If you have you camera on auto mode the camera will actually decide all of these things for you, working out the best options to try and obtain the best exposure. There is no problem in doing this but in auto mode you are relinquishing control to the camera – it will chose what it thinks is best. When you first start out in photography this is probably a good thing – you have a lot of things to think about and so letting the camera choose what aperture, shutter speed and ISO might not be a bad thing.
But, as you progress and gain more confidence, you may well want to take over choosing these setting yourself as by choosing them yourself you can achieve various effects to enhance your images.
Arguably, the aperture is the most important of the three settings when it comes to flower photography.
As already discussed you can make the aperture bigger or smaller to allow more or less light in through the lens.
However, there is something else that happens when you alter the size of the aperture and it is something that is very important for all types of photography, not least flower photography.
This something is 'depth of field' or DoF for short. The DoF is how much of your image is in focus and how much is 'out of focus'.
With a big aperture with get a small DoF and with a small DoF just a small strip across the image will be in focus - things nearer to you and further away from you will be out of focus. This is something that is often useful in flower photography as it means you can have your subject matter (the flower) in focus but have the background out of focus to achieve a soft, ethereal and beautiful effect.
In the sequence below you can see that in the top image the background is very blurred. This is because it was taken with a large aperture. As we move down the sequence the background become more and more in focus. This is because the aperture is getting gradually smaller and smaller.

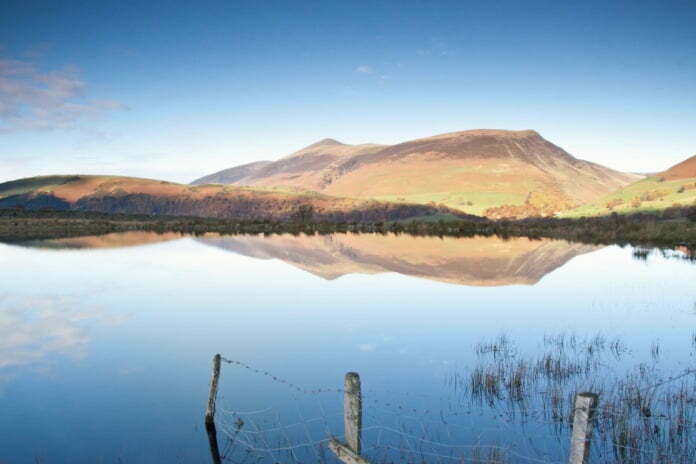
With a small aperture you get a big depth of field meaning that all or nearly all of your image from the foreground to things in the distance are all in focus.
This is useful for landscape photography for example. In the example below you can see that the fence posts in the foreground are in focus but so are the mountains in the background.
So, lets say you decide you want a small DoF to make you flower image appear soft and dreamy and generally gorgeous. You will want, therefore to have a big, or wide aperture.
But, if you have your camera on auto you don’t get to choose this – the camera does, and the camera may decide to give you a small aperture therefore it will not produce the kind of image you were hoping for.
This is where the beauty of the DSLR camera comes into play. You can change the settings on the camera so that YOU choose the aperture. By doing this the camera has to use the aperture setting you have chosen and it will adjust just the ISO and the shutter speed to ensure the exposure of the image is correct. If it happens to be a bright sunny day and you have chosen a big, wide aperture, the camera will increased the shutter speed or decreased the sensitivity of the sensor (or both) in order to compensate for the fact that the aperture is wide open.
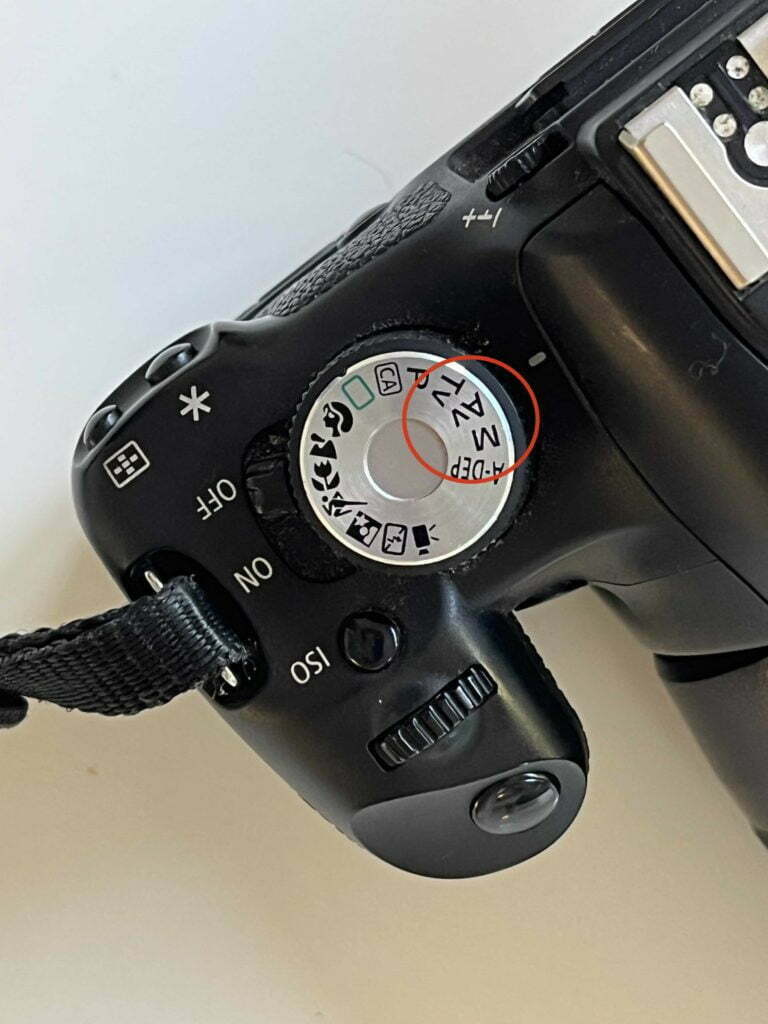
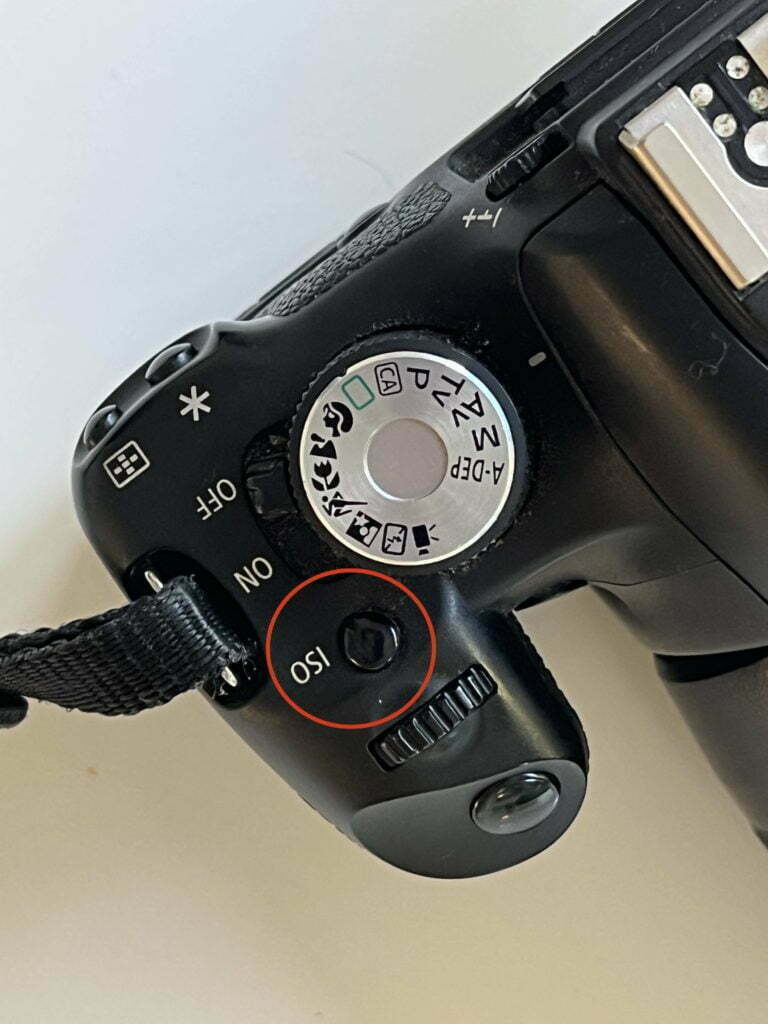
The picture here shows the dial on the camera set to "Av" which is aperture priority – ie the user chooses the aperture and the camera will work out the rest.
As already discussed the ISO is a measure of how sensitive the cameras sensor is to light.
An ISO of 100 is usually considered the 'normal' (although some cameras can go to an ISO of 50)
At an ISO of 100 the sensor is at its least sensitive BUT is it able to produce the highest quality of image.
Hence, if you can use an ISO of 100, use it. You will get the best quality images at this setting.
As you increase the ISO upwards to 200, 400, 800, 1600 the sensor will get more sensitive but there is a price to pay for this increased sensitivity and that is that the images become poorer in quality – they become more grainy. If you are taking photographs in very dim light a slightly grainy picture is better than no picture at all, but generally with flower photography this isn't going to be the case and so using an ISO of 100 is usually best practice. You can adjust your camera so that the ISO is set to whatever you choose.
So, at this point we have decided to set the ISO at 100 so we get the best possible quality of image. We are also going to have the aperture big so that we get the narrow DoF that will give us the soft and dreamy effect we are after.
This means that when we take the picture the only thing the camera needs to work out is the shutter speed.
If there is a lot of light around the shutter speed will need to be quick so as not to allow too much light in. If it is a bit darker the shutter speed will need to be a bit slower to allow a bit more light in.
Do we care what the shutter speed is?
Well, most of the time in flower photography, we don’t!
Shutter speed becomes relevant when taking pictures of things that are moving. If you can imagine a car traveling past you at speed. If you were to use a slow shutter speed then in the time that the shutter was open the car would have moved a lot in the time that it took the shutter to open and then close again. This would give you a blurred pictures of the car. But if you took the same picture of the same car going at the same speed but this time used a very fast shutter speed (shutter speed can be extremely fast indeed For example 1/16,000 sec – ie the shutter is open for just 1 sixteen thousands of a second) you get a different outcome. At this kind of shutter speed the car will not have moved much at all and so you end up with a nice sharp picture of a car rather than the blurred images we got before.
Now sometimes we want to blur in images. Its adds drama and a sense of movement and can add a lot to an image. This will be discussed elsewhere.
For the most part, we want to have clear, in focus images and for this a more mid-range shutter speed that the camera will choose with be perfectly adequate to produce an image with the correct exposure.
So, there you have it. Exposure. In a nut shell.
I guess to summaries all that been said above, usually (but not always) in flower photography, try using the following settings to get the correct exposure:-
Set the ISO to 100. Set the camera mode to Av so it will allow you to set the aperture to 'big'. The camera will then work out the shutter speed for you in order to obtain the perfect exposure of your image.