Dance of the Flowers - How was this done?
Dance of the Flowers
Canon 500D – Canon 70-200mm f/2.8 L II lens @200mm
f/2.8 – 1/500sec – ISO 100 – hand held. 08.00am
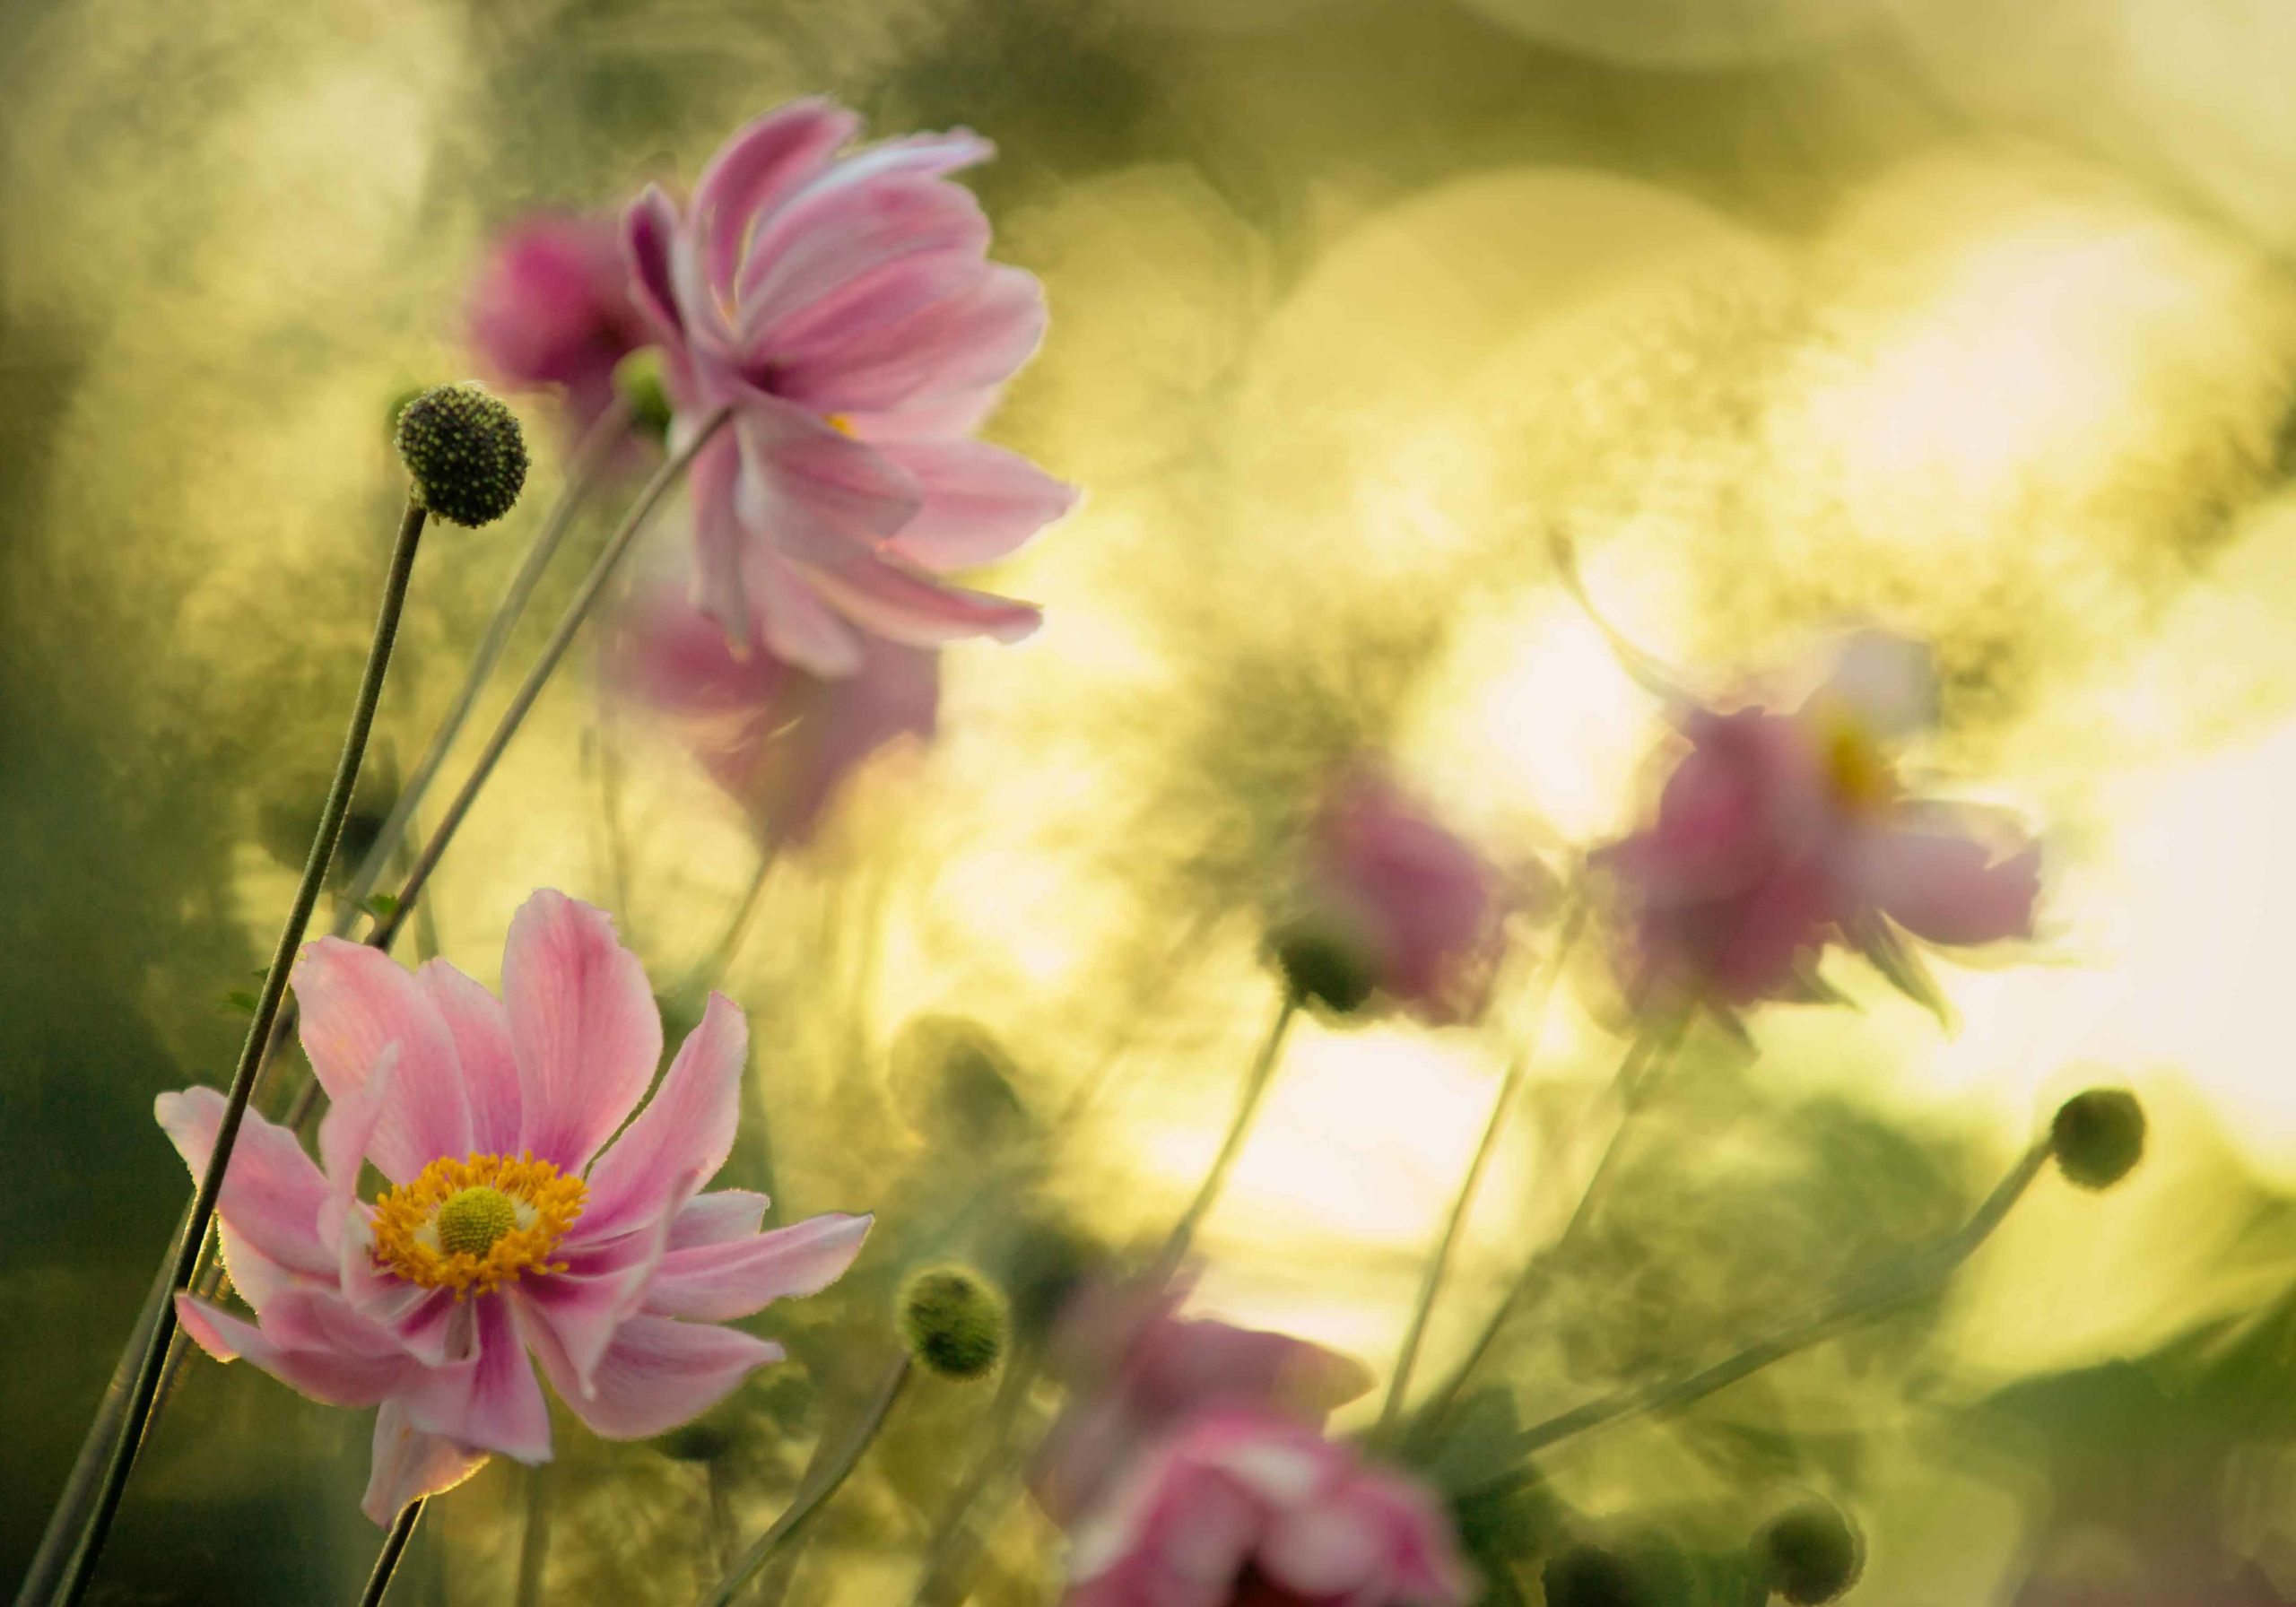
This photograph was taken early one morning in September with me lying down on my neighbours’ dew-soaked lawn.
Her garden is full of beautiful Japanese anemones and I had taken pictures of them before but had never been satisfied with the results. I was using my macro lens to get close up shots and had managed to take some nice photographs. However, nice as they were, they all seem a little bit ‘ordinary’. Also, taking close up macro shots outside meant that even the slightest breeze was causing major problems when it came to getting the photos in focus.
The evening before, I had sat in the garden with the sun behind me casting some soft evening light on to the flowers, but I was struggling to capture anything special. But, it just suddenly occurred to me that if the sun was setting behind me it would be rising in front of me. Obvious I guess but there you go! Perhaps it would create some interesting effects as it shone through the trees that were behind the flowers.
So, next morning, I tried again. The sun rose behind the trees producing a fantastically interesting backdrop. However, there was a slight breeze so focusing was still an issue.
I do tend to do a lot of macro photography but on this morning it wasn’t quite working. Getting close into the flowers wasn’t allowing me to capture what was really the best part i.e. the background. I needed to try to capture the whole scene – a beautiful scene with these gorgeous flowers gently swaying in the light breeze whilst the sunlight through the trees produced a dramatic and haphazard background.
So, I changed my lens to my 70-200mm zoom lens, stepped back from the flowers and sat on the wet lawn. My view was now wider, the background looked great and I was excited at the prospect of being able to capture such a scene.
I really liked the nature of the background and to make more of this I felt I wanted to use f2.8. This would narrow down how much of the shot was in focus and make the background a wonderfully chaotic arrangement of light, colour and ‘randomness’.
The breeze was no longer much an issue now that I was not using the macro lens. My shutter speed at f2.8 was fast enough that even though I was hand holding the camera I felt as long as I got my main subject (a flower) in focus, a bit of blurriness in the rest of the picture was probably a positive thing.
It took a while to work out the best composition. There was such a mass of flowers that it was not very obvious at the outset what would make the best picture. I just started snapping away and gradually it became clear which angles were working and which were not.
I took a lot of photographs that morning. There was some time pressure because as the sun rose I started to lose my beautiful background but I had about an hour in which I think I managed to take about two hundred pictures!
Post-processing
I use Lightroom 3 for post-processing. I also use some of Nik Softwares’ plug-ins. These are a fantastic set of easy to use programmes available for Lightroom and Photoshop.
That morning I had taken so many photographs that narrowing them all down and picking the best one was difficult. Lightroom is very helpful in this regard with the number of tools and options it has available to help make that final selection.
Having finally selected what I thought was the best photograph, I started to work on it.
It didn’t require that much post processing but a there were a couple minor issues I wanted to change. Because the background was very bright, the flowers in the foreground, especially the main one on the lower left hand side, were too dark and the detail in the main flower was not quite as good as I wanted.
I opened up the photograph in Nik Softwares Viveza 2. This programme allows you to select any number of specific points on the photograph and then edited an area surrounding that point (the size of which can be varied) in whatever manner you choose.
I first edited the main flower by slightly increasing the brightness and saturation and then gently increased the definition by increasing the ‘structure’. I then increased the brightness of the bud and flower nearer the top of the picture and the out-of-focus flower which you can just see at the centre bottom of the picture.
I then moved back into Lightroom where I adjusted the overall exposure using the histogram as my guide. As I had been shooting straight in to the sun, I felt that small over-exposed areas were not only acceptable but probably added to the overall image.
Then I slightly increased the saturation of the whole shot giving it that nice warm feeling. No cropping was required. Job done!
Hints
Flowers are beautiful and very photogenic and consequently many people like to take photographs of them. In order for your images to stand out from the crowd try to look for an unusual way to capture their beauty. A shot of a single flower in bright sunlight is not going to set you apart so try getting really close in, try shooting from below, try shooting from behind, try photographing at different times of the day – be prepared to try anything that might give you an image that is a little different, a little more special.
When shooting macro shots, even a slight breeze can lead to blurred photographs. I sometime use a Wimberley clamp to help. This has a tight clamp at one end so that you can fix it to your tripod or any other firm object, and an adjustable arm that has a ‘soft’ clamp at the other end which can be used on the stems of plant without damaging them.
Backgrounds are important. Spending as much time to consider your background as you do the main subject of your photograph, can make or break your shot! Backlighting, as in this photograph, can produce some spectacular images.